
Once you’ve completed the onboarding process, you’ll be taken to the Reqme dashboard – your central hub for managing client requests, communications, and service operations. This guide will help you understand the key elements of the dashboard and how to navigate them effectively.
Dashboard Overview #
The Reqme dashboard is designed to give you a quick snapshot of your service management activities and provide easy access to all features. When you first log in, you’ll see several key sections:
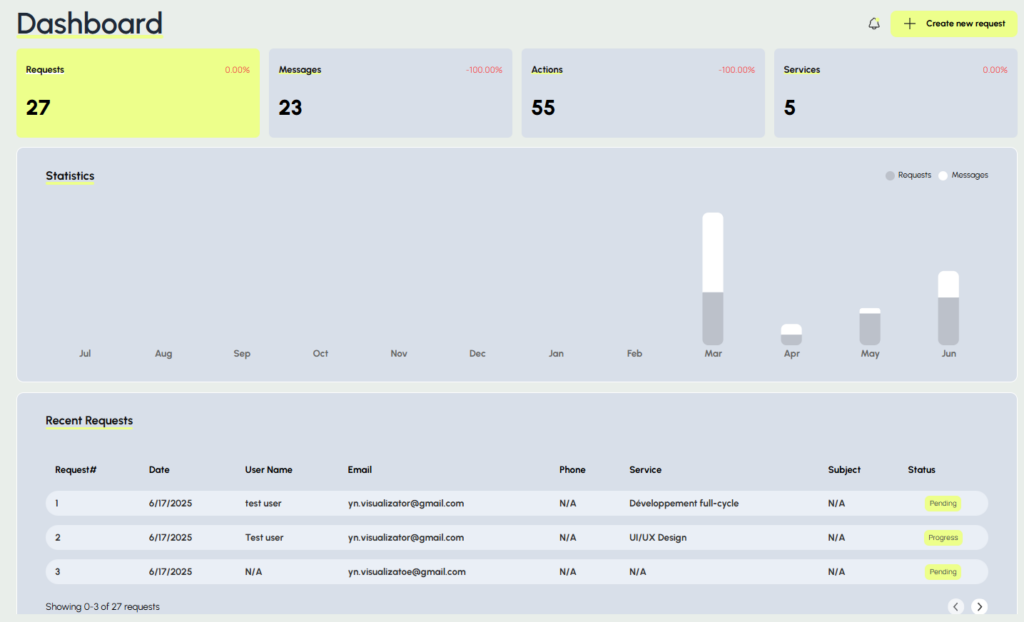
The main Reqme dashboard provides a comprehensive view of your service activities
Main Dashboard Sections #
- Navigation Menu – Located on the left side of the screen, providing access to all main features
- Activity Summary – Shows recent client interactions and system notifications
- Request Statistics – Visual representation of your request volume and status
- Quick Actions – Shortcuts to common tasks like creating new request or viewing recent requests
Navigating the Dashboard #
Left Sidebar Navigation #
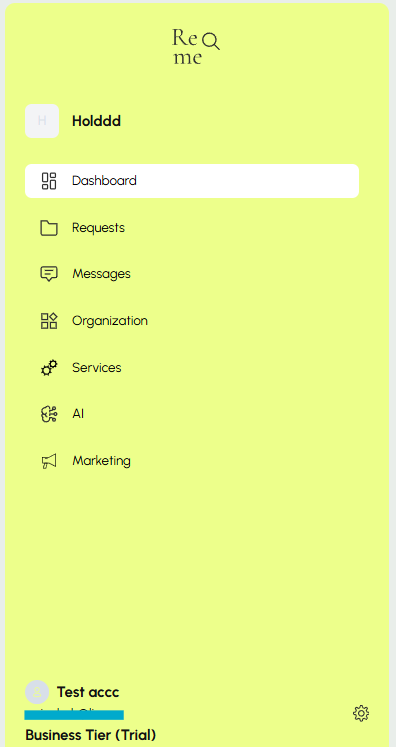
The sidebar menu is your primary navigation tool in Reqme, containing links to all major features:
- Dashboard – Returns you to the main overview page
- Requests – Access to all client requests and their management
- Messages – Communication center for client interactions
- Organization – Your company settings, Description, Website and API key
- Services – List of your services
- AI – With 2 Subsections – “AI Usage” – to track usage of AI tokens, Storage and Your Plan details. “AI Pre-sales” – place where you can add, update context for your AI agent
- Marketing – With 2 Subsections “QR Code” – and link to your request page which you can use on marketing or direct sales promotions. “Public links” – where you can create link for specific need such as Campaigns, Instagram, e-mails.
- Settings – System configuration and account management
Top Bar Elements #
The top navigation bar contains:
- Notifications – Alerts about new requests, messages, or system updates
- User Menu – Access to your profile, account settings, and logout option
- Create Request – you can use this button to send a request page for your possible client from admin
Key Dashboard Features #
Request Management #
The Requests section is where you’ll spend most of your time. Here you can:
- View all incoming client requests
- Receive notifications
- Track request progress through your workflow
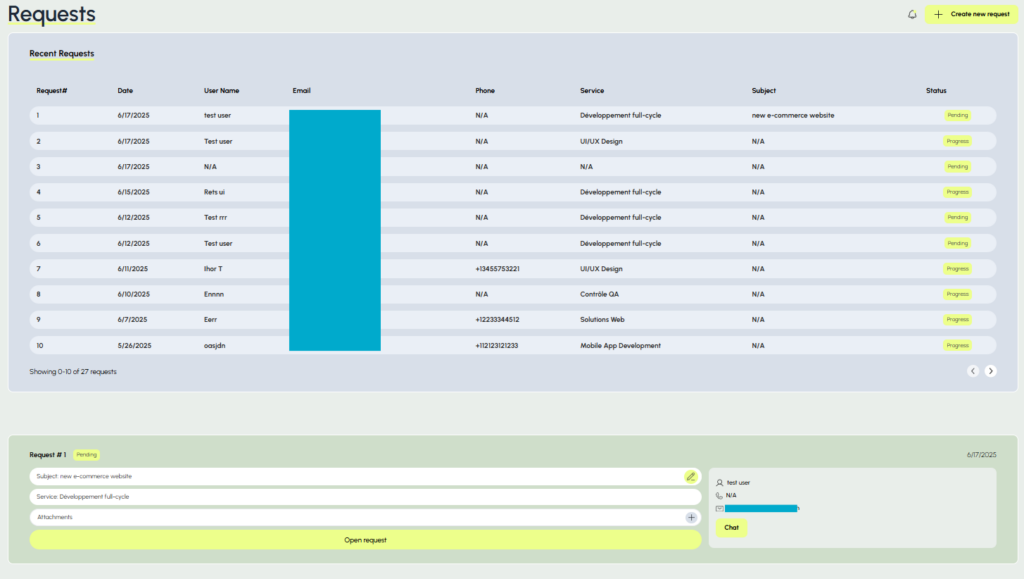
The request management interface shows all client requests and their current status
Communication Center #
The Messages section centralizes all client communications:
- View message threads organized by request
- Send and receive messages from clients
- Use message templates for quick responses
- Track read receipts and response times
Using Quick Actions #
The dashboard provides several quick action buttons to help you work efficiently:
- New Request – Manually create a request for a client
Next Steps #
Now that you’re familiar with the dashboard layout, you might want to explore:
If you have any questions about navigating your dashboard, please contact our support team at hi@reqme.co.


